Wednesday 28 September 2011

A Dull Day

So I think it is about time I made the obligatory sharpening post.  Come one we've all done it we learn to sharpen and we get all excited and we want to brag about it to our friends...and random people on the Internet.  That's ok, now its my turn to share my method.

I am going to start by saying that I know how to sharpen and the way I sharpen my edges works.  This is not to say it is the only way to sharpen an edge (there are thousand...maybe...of ways to sharpen an edge) but my way works and works well.  I will show you the entire process of sharpening an edge using some Marples chisels I acquired recently, and boy could they use some love. 


The first step in establishing a sharp edge is the roughest and longest part of the process.  An edge needs to be true, but what is true.  The trueness of an edge is its consistency of flatness squareness and bevel along its entire length.  Not all of these factors are as important as you may think. 


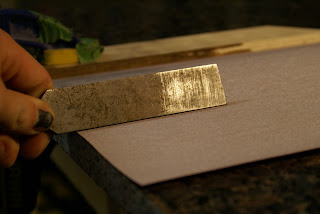
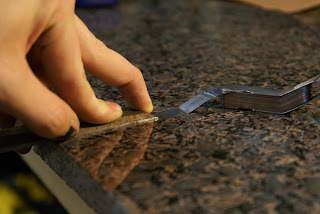
A blade (be it chisel, iron or something else) should have as flat a back as you can achieve, but don't stress over this.  Find a reliable flat surface that will not distort over time to use when lapping the back of your blade.  When I first started started sharpening I used a piece of glass and recently switched to a piece of granite.  Something to keep in mind is that to get consistent results with your sharpening method you must remain consistent, if you change to a new lapping surface you should reflatten the backs of your blades on this new surface, more on why later.

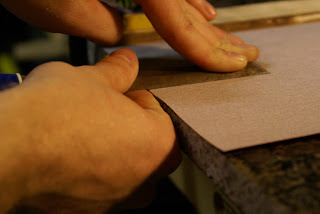
Once you have a flat surface you need an abrasive to work the metal on.  I usually begin with some 120 sandpaper (I use norton 3x wood sandpaper).  Using the 120 sandpaper I work the blade back and forth along its length (to achieve scratches parallel to the long sides of the chisel) and do not stop till I have a consistent scratch pattern across the entire back. 
After the 120 I move up to 180 grit and work the steel until I cannot see any of the scratches created by the 120 sandpaper.  To see what my surface looks like I hold the blade beneath my desk light and look for a consistent reflection on the steel.  If I am having trouble seeing exactly what is going on I use a small magnifying glass to get a better look.

After the 180 I move onto 220 sandpaper and repeat the previous step.  Then I move onto 320, 400 and then 600.  The final result should be a consistent surface across the back that feels smooth to the touch.

How far up the blade you flatten is a matter of Steel hardness and time.  Over time as you resharpen the bevel of a blade you slowly work back up the blade.  If the steel is softer this process is faster and will require more area to be flat for the blade to remain flat over its life.  It is beneficial to flatten a back as few times as possible (each time you do it there may be small variances that can effect its previous flatness), so put in the time and effort and flatten as much of the blade as you can in the beginning.

The follow up steps involved in achieving a sharp edge will be posted in the weeks to come.  So if you want to learn how to get those edges super sharp stay tuned.

Cheers
Hans Christopher
Wednesday 21 September 2011

One Ugly Duckling

So with no school today I had the whole day to spend down in the shop.  I started by continuing on my sawbench.  I glued up the front legs and stretchers (wrong way first...I hate do overs), and while that was drying I continued onto some other shop projects.


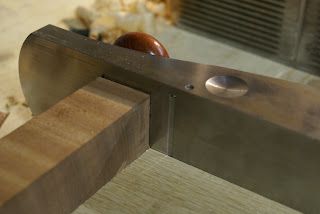
I built a mitre shooting board a while back during the cabinet door project and now I have gone onto build a standard shooting board, and I screwed it up.  The issue is that when I was planning the end grain (planning sapele end grain is not as bad as I thought) I chamfered the ends of the fence block so now when I plane a piece up against the fence the work piece continuously blows out.  It is fixable so when I can I'll take off the fence and plane away the chamfer.

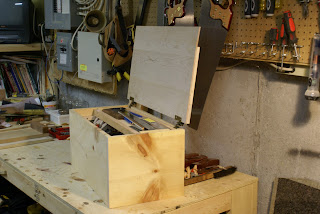
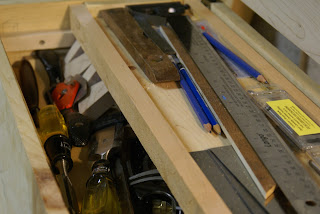
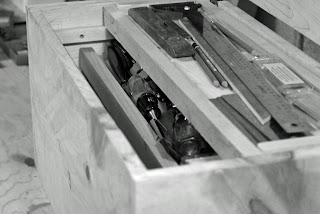
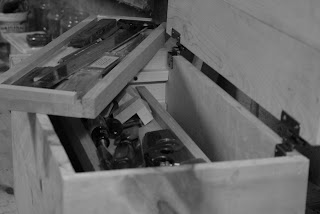
The big accomplishment today though was completing the ugly duckling.  What is this ugly duckling I speak of; well it is one ugly tool chest that I now having sitting in my shop.  The chest is a simple construction of all the spare junk I had in the shop, the chest is meant to hold and protect my complement of hand tools (or at least most of them).  It is 2'x1'x1' box made of pine and maple with two tool tills.


The chest holds:
Jack Plane
Jointer Plane
Block Plane
Router Plane
Shoulder Plane
Spokeshave
Brace & Bits
Hand Drill
Fret Saw
Beading Tool
Chisels
Mallet
Rasps & File
Scrapers
Marking Knife
Dovetail Markers
Square
Level
Ruler
Dividers
Measuring Tape
And other miscellaneous items

  
This chest is by no stretch of the imagination perfect, far from it.  The chest is a bit to small, I have none of my saws (besides my fret saw) in there which I would have liked.  The tills are a bit to large to allow for easy acces to bottom of the chest. The lid doesn't stop all the dust from getting into the chest.  For me these are some big issues that I should address either by retrofitting solutions onto the chest or by building a new one (probably the latter).  In the mean time the chest does work well enough to hold and protect my tools so it is a welcome addition to my shop.

Cheers
Hans Christopher

Monday 19 September 2011

Back In the Swing Of Things

This past week I went back to college, or at least I tried to.  A strike by the school's support staff has made going to classes very difficult.  Benefit of this was an extra week of summer vacation, and some more shop time.  Some nice additions to the shop this week include my first set of handsaws, my first marking knife and a new quality combination square.
I am very exciting about the two new saws.  With the addition of them there is almost nothing I cannot do now in the shop with only hand tools.  The two saws are a Pax rip saw and a panel saw.  Pax saws are hand made saws in Sheffield England and have been since 1776.  The saws are amazing, they are sharp and follow a line well (when user error does not occur).  Now with these saws I can break down rough stock which is the first step any project.
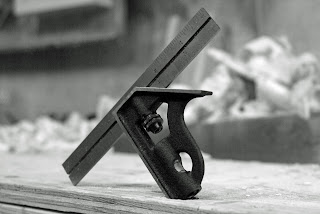
I also purchased a Starrett 6' combination square, and wow is it ever a square.  Previously I have been working with an old home centre 12' square, and it worked but not like this new one.  This square is  rugged it is built like a tank and  ready to work.
And finally I got my first marking knife.  This was not a necessary purchase, marking a joint with a pencil or an utility knife works just as well, but as hand tool woodworker having a marking knife is part of the tool kit, and I just like buying tools.  All of these tools I purchased from Lee Valley.

With the purchase of the two new saws I now have need for a saw bench so I can properly use my new saws, so I have begun work on one and will keep you updates as it nears completion.

Below are a collection of photos from my Italy trip.  These images are all of Statues within The Vatican.  Enjoy.

Cheers
Hans Christopher

Sunday 4 September 2011

Born Again

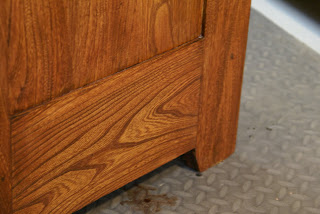
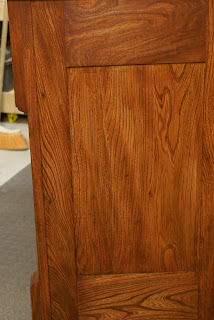
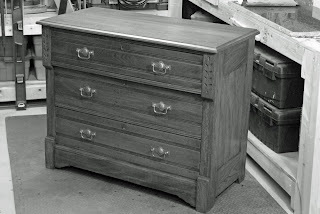
This last week sees the completion of my latest project and I couldn't be more happy with the result.  I originally believed that the piece was old growth pine, but after some research and the opinions of some of my fellow woodworking friends (big thanks to the guys over at the woodwhisperer live chat) I know am pretty certain the piece is made of chestnut.  A rare treat because chestnut is only available know as a salvaged material, because chestnuts were wiped out by a blight in the early nineteen hundreds.  Without further delay I present the finished dresser.


Well there you have it the completed dresser.

Cheers
Hans Christopher