So yes finally I have begun the bench build *arms in the air cheering*. I recieved the Benchcrafted Shaker Bench Package for Christmas and now after a trip to my local lumber yard I am ready to begin.
I got my cherry lumber into the shop and let it sit there for almost two weeks before I started to work with it. I let the wood sit for two weeks so that it would acclimatize to the shop; I'm hoping that will minimise warping once I start milling the lumber.
Three 8' boards of 6/4 cherry and some random offcut pieces
First stage of construction is to flatten the three monster planks of cherry, and I mean monster. All three were 8' long and the widest was 14 1/2" wide. I started with my long angle jack plane set up with a 25 degree blade; the low angle made taking traversing passes a breeze. After the jack plane I moved up to my number 6 Stanley and took some diagonal passes along the lumber.
Jack Plane traversing passes.
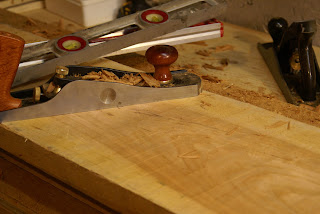
I did a rough flattening to one side of each piece; I only worked to take out the majority of the cup and elimainated all twist, so that I could flatten the opposite side by running it through the power planner.
No more twist, so ready for the planner.
After the pieces had passes through the planner I started to think about gluing up the bench top. I picked the two pieces I wanted for the bench top and then jointed one edge of each of them so I could get a nice tight glue joint, and then ran the opposite side through the table saw to get a parrel edge (really hard to do with a small tablesaw thank gawd for a roller stand)
Edge jointing and the creative support solution
After the glue up was done it was on to cutting the top to its final length. With a pencil and marking knife and a good square and a good straight edge I laid out the two cross cuts, one at either end, and then went and grabbed my panel saw and made the cut.
Crosscutting the top
Well as it is now the top is the the right size. The next step will be to add the aprons and dog hole strip. After that it is on to the wagon vise. And then it is onto the base and on and on. Stay tuned.
Cheers
Hans Christopher


Wow Cherry top , this is going to be a pretty bench , that's some sweet looking lumber you picked up . Are you using the levels as winding sticks ?
ReplyDeleteYea the lumber turned out better then I could have hoped. It is face grain so I am a little worried about twisting in the future. There was only one not whole in the entire top (I fill it with epoxy). And yes I did indeed use the levels as winding sticks.
ReplyDeleteCheers